

Introduction
Dark Reign 2 is a Real-Time Strategy game along similar lines to Command & Conquer or Starcraft, but this time there is a difference. Rather than the fixed isometric view used in so many of these games Dark Reign 2 was made to be fully 3d. Although this is not the first time that this has been done in a strategy game Dark Reign 2 was created with the mod community in mind and the possibilities this opens up are not to be sniffed at, especially from a machinima creation viewpoint.
This article is going to be looking at the process of creating simple cinematics in Dark Reign 2 (DR2). It's not going to be explaining how to make a really good map, or how to script really complicated in game sequences but the basics from which to get started. This is going to be a multi-part article as there is simply too much information for one article, but by the end of the article you should have a working cut scene of a battle between the two opposing factions from the game, the JDA and the Sprawlers.
Let's Start By Making A Map
The first step for creating any sort of movie is to have a map in which your film can take place. To do this we are going to use the editor that comes with DR2. If you've read the readme file on the cd about loading the editor and followed the instructions given there on loading it you'll probably have found, as I have, that it won't load so I'd recommend this alternative approach instead.
Load up DR2 normally and bring up the console by pressing CTRL + ALT + F10, then type the following:
sys.runcode studio
The map editor automatically loads the map that was just loaded, so it is worth remembering that the menu screen is a map as well and that will tend to be what the editor loads as a default. We're not interested in altering this map, and would much rather create our own. So once the editor is loaded, left click on the "tools" button in the bottom left hand corner of the screen, and then on "new".
As this is more of a test run than anything else it'll be easier if we keep the map small so I'd recommend setting the size to about 200 units, and lets try to create a pleasant grassland for our map so we need to change the "world" setting from "sprawl" to "jungle".
What we're presented with at this stage should be a large flat green map with a 3x3 grid highlighted in yellow. There should also be a couple of menu boxes on the right hand side of the screen, one of which should say "terrain", if this menu bow is not there then press "1" and it should appear.
You'll notice that the highlighted grid moves about as you move the mouse but what you may not realise just yet is that if you press the right mouse button the grid changes colour from yellow, to red, to green, and back to yellow again. Each of these colours represents a different method of altering the map. When the grid is red left clicking on the map will alter the geometry of the map, but more in exactly how to do that in a minute. When the grid is green the geometry is left untouched but new textures can be added to the selected area from the list of textures at the bottom right of the screen. When the grid is yellow then the geometry will be altered, but the area will also be textured, essentially it is the simultaneous use of the other two functions.
A word of note, the textures do affect movement. For example, the "Mountain_Air" texture is completely impassable to all units (including flying ones). This is worth considering when designing your map but is fairly obvious really, vehicles move quickly along roads but can't cross mountains, and so forth.
There are two different methods of altering the geometry of a map in the DR2 editor, the first of these methods raises the landscape underneath the cursor grid. The exact way in which it does this can be altered in the terrain menu on the right hand side of the screen. Underneath the word "Deform" in the "Terrain" menu are a list of options ("Bell", "Flat" and "Smooth")that alter the exact manner in which the landscape is deformed.
For this technique to work the "Raise" button on the "Terrain" menu must be depressed. Go and try this out by selecting "Bell" from the "Deform" menu. Now left click on the terrain to make it rise or hold down Lshift + left click to lower the terrain. Selecting "Flat" will have a similar effect but the mountains/hills that are created will have a flatter top. The odd one out of these options is "Smooth" which will round of and smooth the landscape, something that is normally done with a near comeplete map to make it more realistic.
The second technique sets the height of the landscape to a specific value within the grid selection. To out this method click on the "Raise" button so that it is no longer depressed and then move the "Height" slider to a new value (the default height for a map is 10 units). Now all you do is left click on the map and the selected area will be changed to the new height that you've defined. It is possible while using either of these techniques to press the space bar to set the "Height" slider to the height value of the landscape under the grid (essentially an eye-dropper for height values).
The only other thing that needs to be mentioned at this stage is the use of the + and - keys which increase and decrease the size of the cursor grid respectively. This enables you to alter large areas of the map very quickly and then shrink the cursor grid down for fine tuning the geometry afterwards.
Now that you know how to alter the geometry and textures of the map have a bit of a play around until you've got a map that you're happy with. I'd probably recommend some rolling hills and some sort of more prominent feature like a valley or cliff or something.
Changing The Light Levels
This is something that is very easy to do and can greatly influence the feel of a level. When designing a full mod it is possible to fully define the ambient, sunlight and fog colours at any time of day so that there will be the proper transition between day and night. For us, however, it will suffice to be aware that these values can be changed. The best way of doing this is through some experimentation.
Bring up the "Tools" menu if it is not already up and then click on "Light Time". This should take you to a menu screen with several sliders down the left hand side and three coloured bars down the right. These three coloured bars are the ambient, sunlight and fog colours mentioned earlier. In the middle top of this menu is a green bar with three coloured stripes in it. Double click on this bar to alter the light settings (technically you're altering the settings at a given moment of the day, but as we don't need complete cycles....). Now all you have to do is select the colour you wish to change and either edit the rgb values directly or select the colour from the palette available.
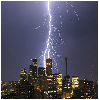
The default lighting makes the jungle look quite bright and colourful, but that's a bit dull really so try and create a more stormy feel to your map by darkening down all three colours and changing the ambient colour to a dark blue. Although this may not be the feel that you'll be looking for in your own cut scenes but it'll fit in a lot better with what I'm about to demonstrate with the weather effects.
Adding Some Weather
Once again this is something that is very simple to add, but can create a marked improvement in the feel of a map. As I've already mentioned we've got a stormy looking sky over our landscape so all things considered we need some rain, and probably a bit of lightening too. Bring up the "Tools" menu and click on "Weather". Although the weather effects are created in the editor they have to be called from a script later on. The advantage of this is that it means you can have a variety of weather types on a single level and just have them triggered at different times. For the moment though we're going to stick to creating the rain storm that I've mentioned.
Click on "Create" at the top of the "Weather" menu and enter a name for the effect that we're creating, in this case "storm" would be quite appropriate. Both the actual rain and the impact with the landscape can be altered. First of all I'll go through what each of the fields do in the "weather" section rather than the "splats" section, which I'll be coming to shortly.
Field Effect
Color rain rgb value
Fall angle of rainfall
Grid/Drop size of rain grid/number of drops in grid
Spd/Strike speed of rain/frequency of lightning
Wid/Hgt dimensions of rain streak
Scale scale of streak
To create the feeling of a storm it is probably worth while increasing the size of the rain grid, the dimensions of the rain streak and the frequency of the lightening. The default "splat" settings are probably Ok for what we're doing here, but here a table of what the different fields do anyway, in case you want to alter them.
Field Effect
Count number of splats in grid
Color rgb value
GroundSplat Sets weather to splat on ground surfaces
WaterSplat Sets weather to splat on water surfaces
Min W/H minimum dimensions of splat
Max W/H maximum dimensions of splat
Off/Life life of splat
Once again a small amount of experimentation should give you the result that you're looking for. By now you're probably getting a bit frustrated with just playing about with these effects and want to get on with adding some units to this map as frankly a map with no units on is a bit dull.
Defining Regions In Your Map
Before we go any further I'd recommend saving everything you've done so far and backing it up, as the first couple of times I tried the next section the map refused to reload afterwards. For some reason if a team is created but not given a start location the map will not load, even in the editor, with this in mind it is a good idea to read through this section and the next one before proceeding any further with your map.
Defining regions is a very simple process. First of all bring up the "Regions" menu by pressing "5" on your keyboard. This menu should replace the "Terrain" menu that you were using earlier. Simply drag out the area that is to be the region using the left mouse button, then enter the name of the region in the blank field just above the "Create" button, before finally clicking on the "Create" button.
What we're going to be doing here is creating two regions which will be the starting positions for the two factions in our short movie. All you have to do is create a region at each end of the map, calling one of them "Team1" and the other one "Team2". The flags which mark out the boundaries of the region should turn grey once the region has been created. If we were to play this map then these would be the starting camera positions depending on which team was being played.
It's A Game Of Two Sides
Chances are the "Team" menu is probably still up (it'll be above the "Terrain" or "Region" menu) but if it's not it can be found on the "Tools" menu. At the moment we don't have any teams at all so we need to click on "New" and enter the name "Team1", then click on "ok". If we double click on "Team1" on the menu it'll take us to the properties for that team, so we should probably go and do that now.
In the team properties the following changes want to be made. All of the five buttons on the left should be active ("Default Team", "Available to Players"...) and in addition to that a team colour should be set, probably something like bright red so it stands out. Having done that press the button next to the words "Start Camera" and select "Team1" from the list. This is selecting the region that we defined earlier as the starting position for this team. The "Default AI" should probably be set to "aggressive" although once you have more experience with scripting movement and the like you may wish to change this. Finally set the team to play as the JDA from the pull down menu in the bottom left of the screen. That's everything for "Team1" so click on "ok".
Of course no battle is complete without having something to fight against so repeat the above process for "Team2" but do select the "Default Team" option as only one team on a map can have that selected and we've already defined it for the other team. Obviously every mention of "Team1" should be "Team2" and to finish they should be set to play as the Sprawlers rather than the JDA, along with having a different team colour such as blue.
Adding Some Units To The Battlefield
We've finished with the "Regions" menu now and instead need the "Objects" menu which can be accessed by pressing "2" on your keyboard. This gives us a list of all the objects which can be added to the map. We can filter this list by clicking on the categories in the top window of this menu.
In our case we wish to add an assortment of JDA units for "Team1" so click once on "Team1" in the "Team" menu. If you do not do this any objects you create will not be assigned a team and as such will not be controllable. To place a unit on the map all you need to do is select the unit that you wish to place from the list of objects and then left click on the map. This should place the desired unit on the map as a member of the desired team. image 25
Basically repeat this process for both sides, remembering to allocate Sprawler units to "Team2", because although the level will still work with "traitor" JDA forces it probably isn't what we're looking for. Once the units are positioned you can turn them on the spot or reposition them by left clicking on them to select them and then dragging them to their new position or holding down ALT or CTRL and rotating them to face the correct direction depending on which plane you wish to rotate them in.
Still To Come
That's all for the first part of this article. In the next part we'll be going through the use of cameras, some basic scripting and how to add custom music and sound effects. Of these the biggest section by far is scripting as it is at that level that units are moved and controlled, cut scenes are triggered and almost every other effect is created. Until the next part is available I'd recommend playing around with the editor and seeing what kind of maps you can make, although I'd not recommend trying an indoors scene.